Porch Pitch Problem Pertaining To Poor PVC Pipe Precision
The information below describes and shows the cause and correction of a porch pitch problem pertaining
to poor PVC (PolyVinyl Chloride) pipe precision.
It also demonstrates new uses for your Shop Vac, Leaf Blower, and Treadmill.
The November 2013 photo below shows the porch with a crack that formed in 2013.
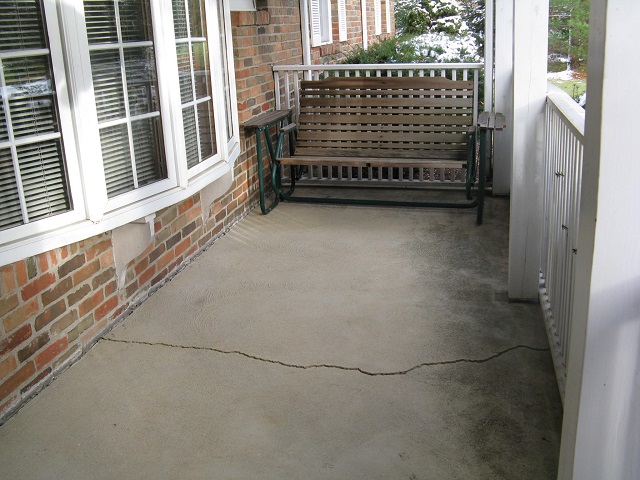
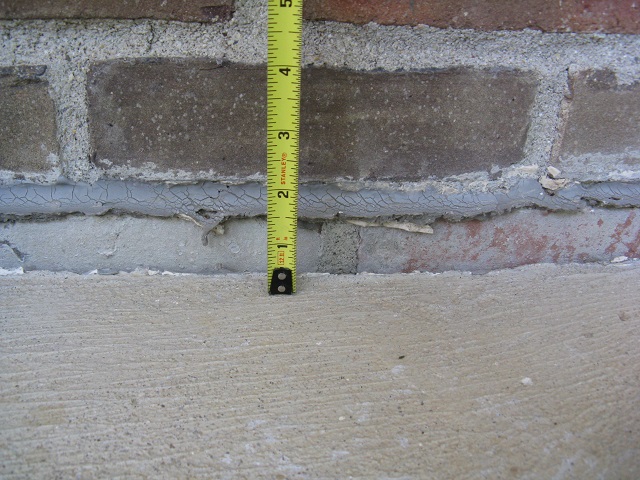
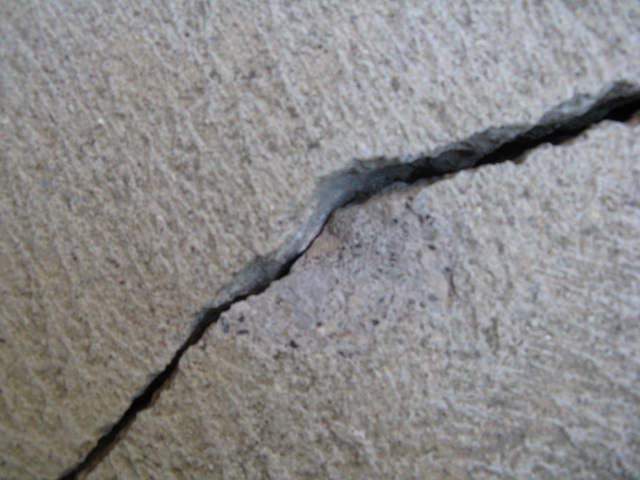
The November 2013 photos below show the crack was approximately 3/8 inch wide and dropped approximately 1/2 inch at that point (left) and the porch end dropped approximately 1.5 inches (right).
 |
 |
In March 2014, a concrete leveling company estimated that it would cost $500 to raise and level the porch and that many houses in the area had similar problems due to dry ground. However, the author would not make the repair till the cause of the pitched porch was determined and corrected.
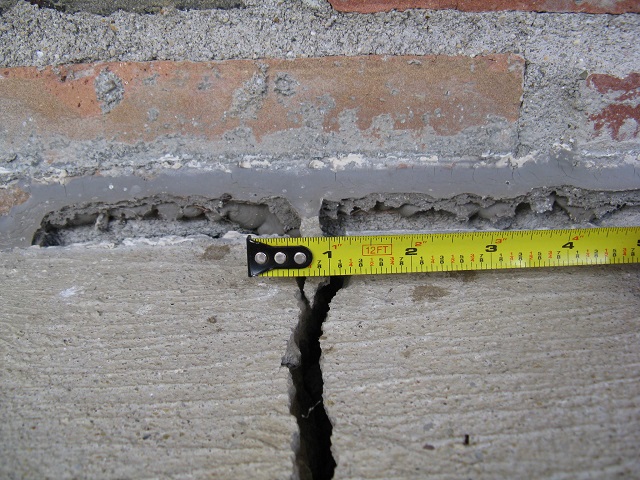
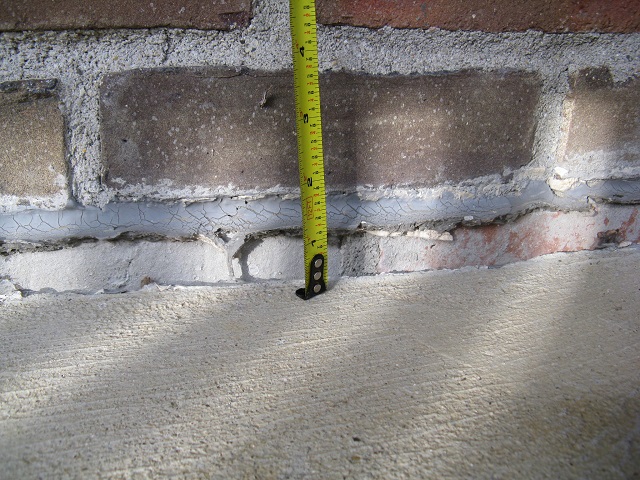
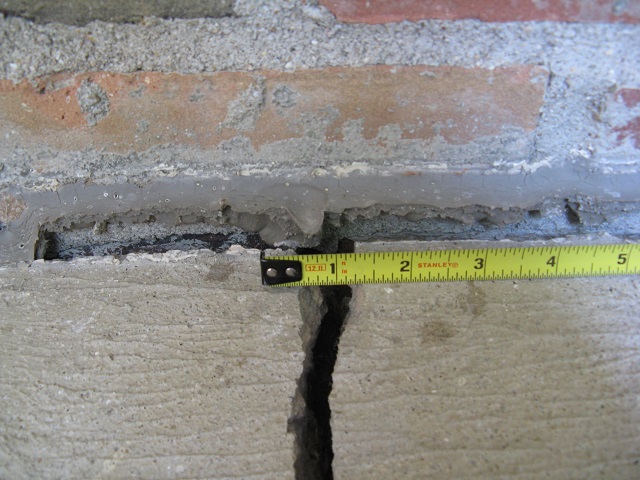
The August 2016 photos below show the crack was approximately 1/2 inch wide (1/8 more since 2013) and dropped approximately 5/8 inch (1/8 more since 2013) at that point (left) and the porch end dropped approximately 1.75 inches (1/4 more since 2013) (right).
 |
 |
Note that in October 1999 (nearly 17 years before the August 2016 photos above), the downspouts of
that portion of the house were joined with 3 inch PVC and connected to the 4 inch PVC where the
house foundation perimeter drain exits below the house footer. This required digging outside the
basement wall, at the end of the porch, down 10 feet to make that PVC connection.
Note too that in April 2003 (over 13 years before the August 2016 photos above), the house main
water supply line was relocated horizontally to 4 feet above that point from the basement floor in
preparation to finish the basement. This required digging outside the basement wall, at the end
of the porch, down 5 feet to relocate the main water supply line there.
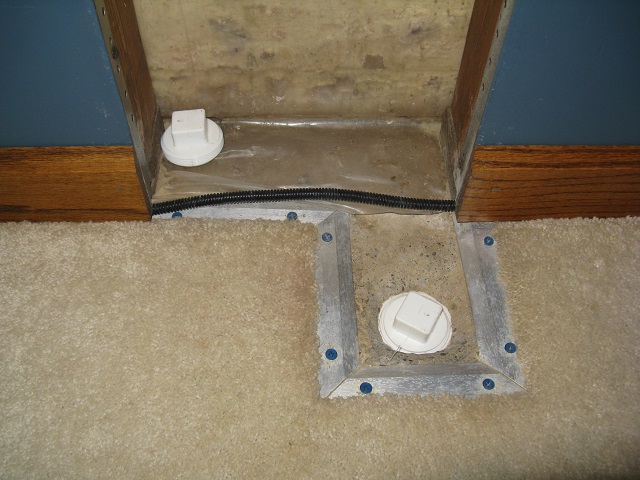
After the porch pitched 14 years later (2013 - 1999 = 14), the author considered the possibility that there could be an issue with that PVC connection and/or the main water supply line, either of which may have caused water to erode soil away causing the porch to pitch. Fortunately, the author had also installed an access hole, for inspection and cleaning, at that point in the basement floor as shown in the photos below.
 |
 |
A book shelf is normally located there to cover the area and to provide easy access to that and to turn the house main water supply on and off when necessary.
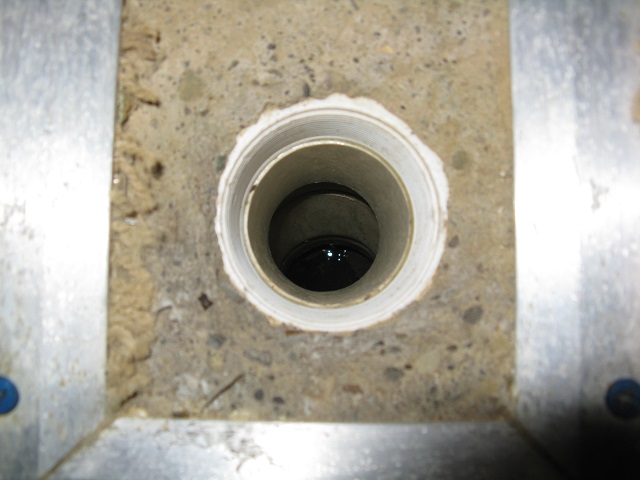
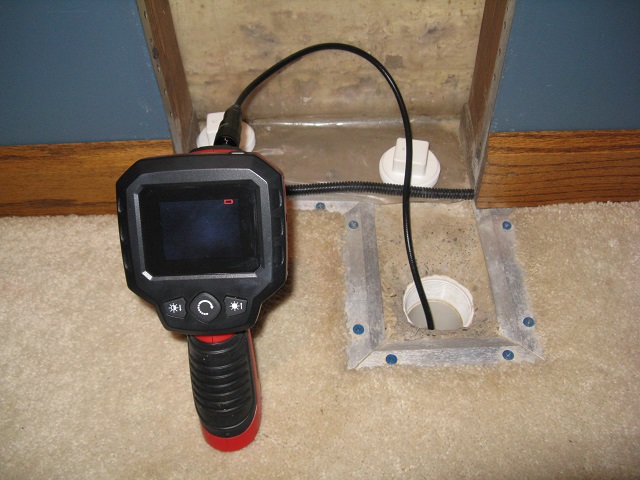
A Digital Inspection Camera shown below (left) was purchased from Harbor Freight (right) and used in an effort to inspect the PVC connection.
 |
 |
A sample of water from the bottom of the drain was then acquired as shown in the photo below.
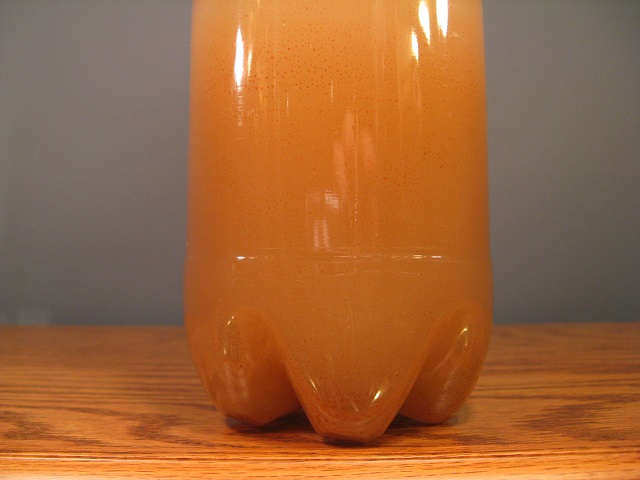
That muddy water sample was proof that there was very likely a PVC connection issue as well as a
possible main water supply line issue.
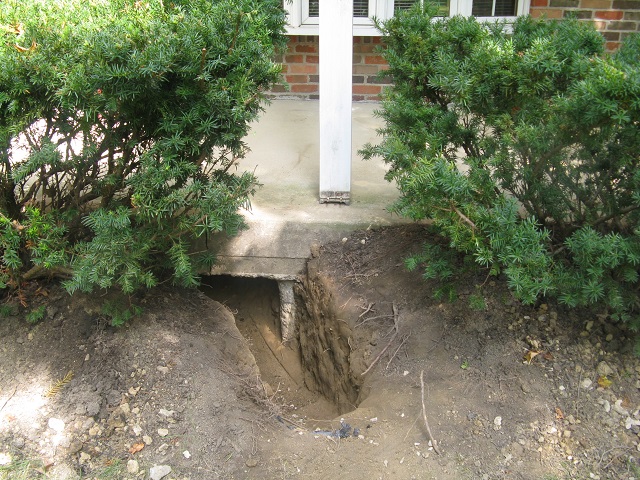
That required the author to once again dig down 10 feet at the end of the porch to below the house
footer to determine exactly what was causing the problem and to correct it.
Fortunately, 17 years earlier after making the PVC connection, the author had lined the hole with
filter fabric and then filled with gravel.
Unfortunately, it is very difficult to dig gravel.
Fortunately, a Shop Vac removes gravel effortlessly, although time consuming, and the filter must
be cleaned often to produce enough suction to pull the gravel up 10 feet.
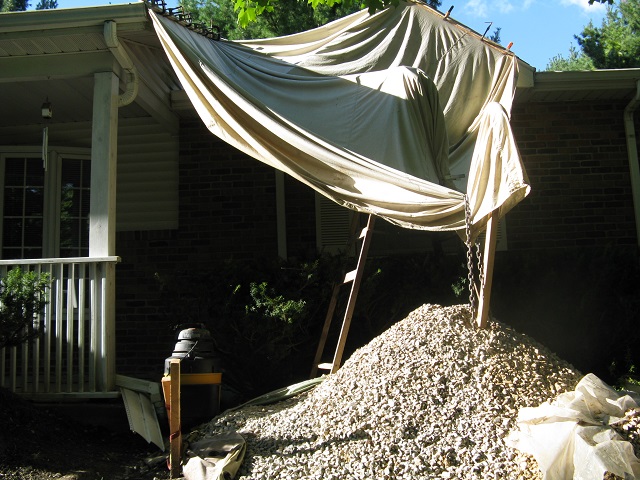
The Shop Vac and the gravel removed with it are shown in the left photo below.
The bush was strapped and staked back and a car cover used prevent rain water from soaking the
ground around the hole and possibly cave in.
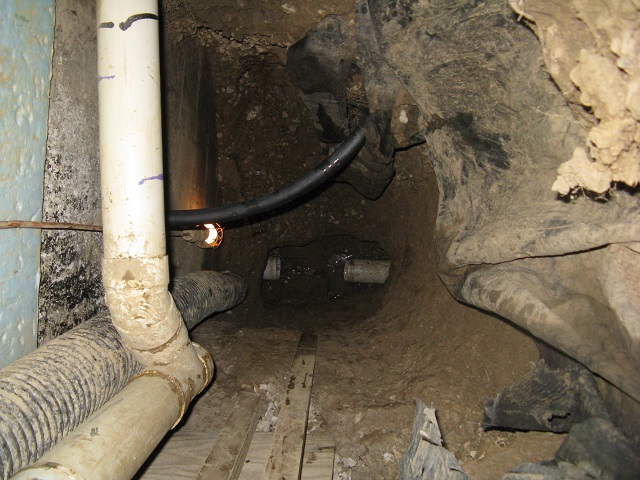
The hole with the gravel and PVC connection removed is shown in the right photo below.
The main water supply line entering through the basement wall is in the center of the right photo.
There was no issue with the main water supply line.
 |
 |
After investigating the issue thoroughly, it was discovered that the 4 inch PVC drain pipe was of
poor precision.
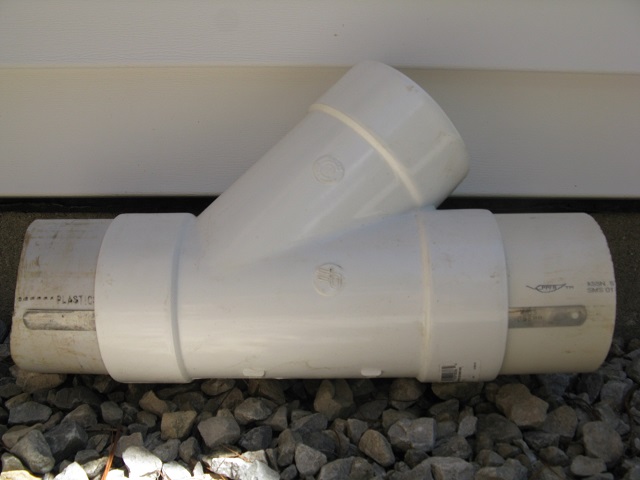
The photo below shows a section of that poor precision 4 inch PVC pipe inserted into the left side
of a 4 inch PVC Y adapter and a precise 4 inch PVC pipe inserted into the right side.
On the left, a 0.620 inch stack of feeler gauges easily slides between the outside wall of that
imprecise PVC and the inside wall of the Y adapter.
On the right, a 0.003 inch feeler gauge is forced between the outside wall of precise PVC and the
inside wall of the Y adapter.
That 0.620 inch gap (nearly 1/16 inch) in the connection allowed water to escape from and then enter back into the
pipe thus flushing soil down the pipe and causing the porch to pitch and eventually crack.
It will be shown what prompted that crack in the porch to crack where it did.
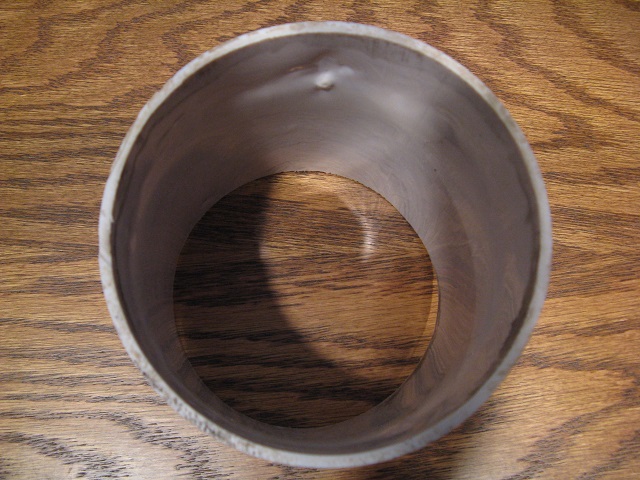
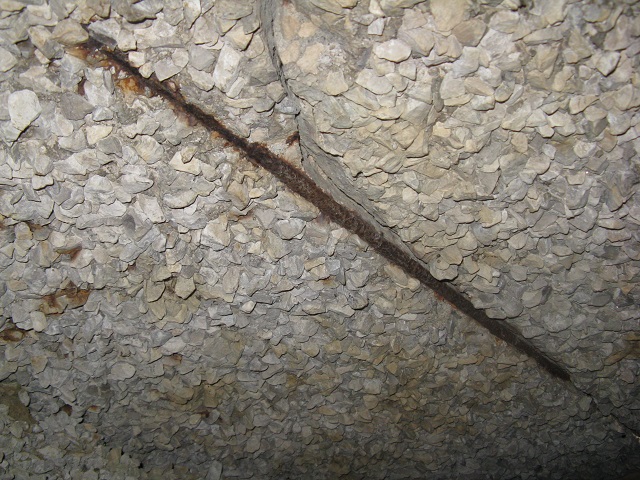
Examining the inside of that imprecise 4 inch PVC pipe in the photo below reveals deformities that may possibly be related to that poor precision.
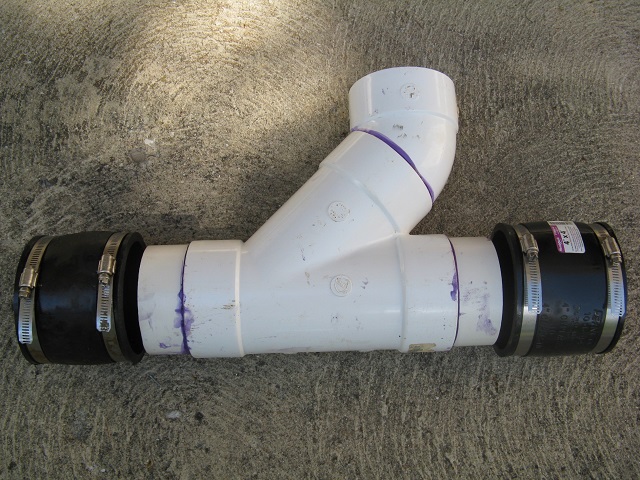
The poor PVC pipe precision issue was solved by using two 4 inch rubber boots, as shown in the photo below, to join the precise 4 inch PVC with the imprecise 4 inch PVC.
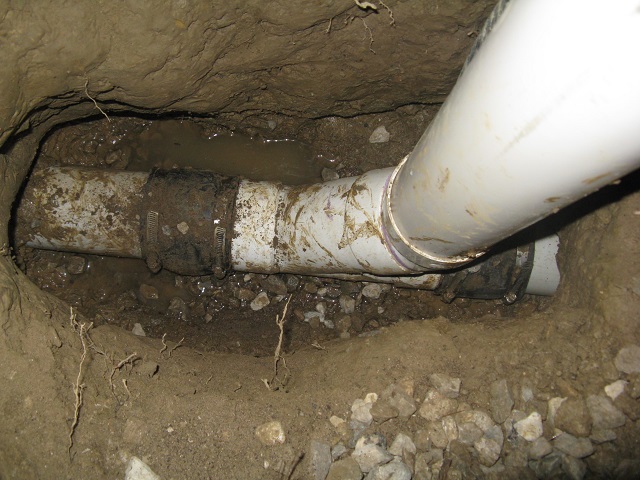
The apparatus in the photo above is shown installed in the photos below.
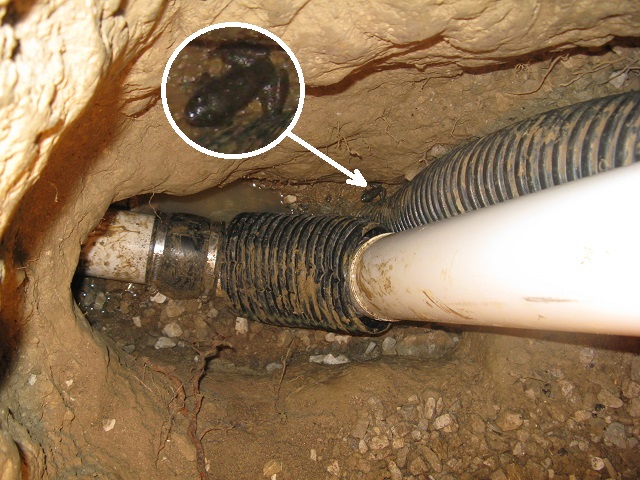
Notice the frog as magnified in the right photo. Several frogs were harmlessly removed and relocated
with the Shop Vac during the work.
Mice can also be easy to catch and harmlessly removed and relocated using a Shop Vac.
The split corrugated pipe over the Y adapter in the right photo is to protect the adapter from
possible damage while gravel is shoveled in.
The vertical corrugated pipe (next to the frog) was installed previously and extends from below the
footer to ground level above to aid in weep hole drainage and radon gas venting.
For information on acquiring a dry basement, see Damp Basement Wall Solution.
For information on radon gas removal, see Radon Gas Mitigation.
 |
 |
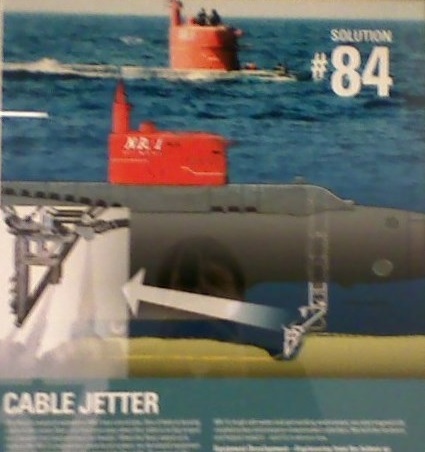
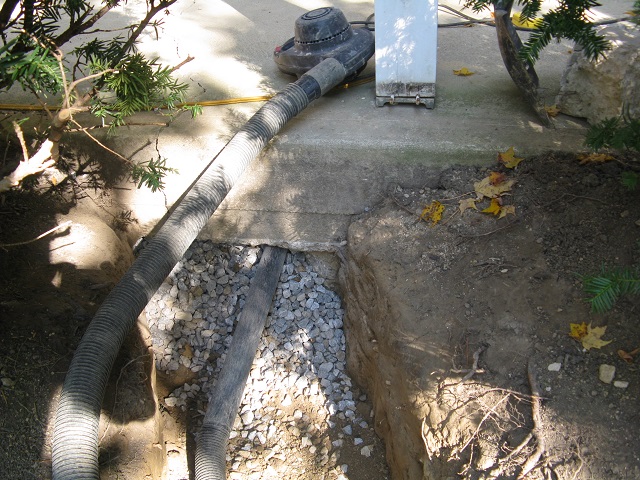
It may be worthy to note that removing dirt from under the PVC pipe, to make room for the rubber boots to slip over, was made easy by using a high pressure water hose to flush out dirt and then vacuum with the Shop Vac. This is similar to the method used by a client of the author for their Submarine "Cable Jetter" that buries cable in the ocean floor:
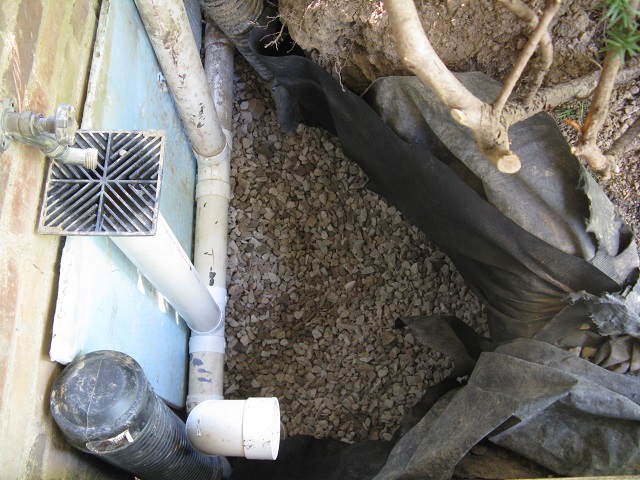
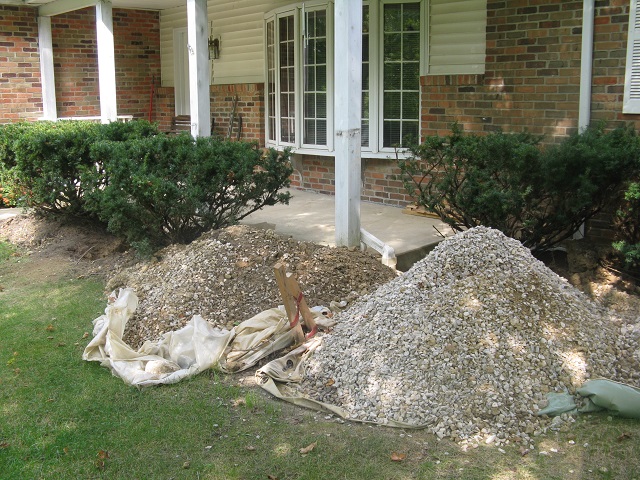
After the new connection was complete, the hole was lined with filter fabric and filled with gravel
to the level of the downspout and spigot drain connections that were then made as shown in the
left photo below.
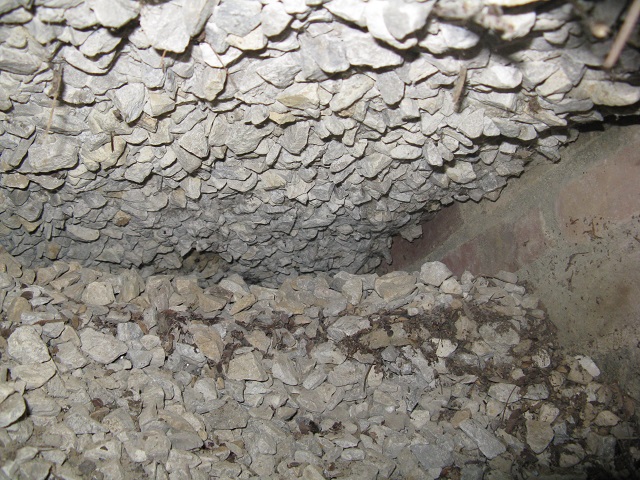
However, as shown in the right photo below, much gravel spilled out from under the porch during
the digging (i.e. vacuuming) process.
 |
 |
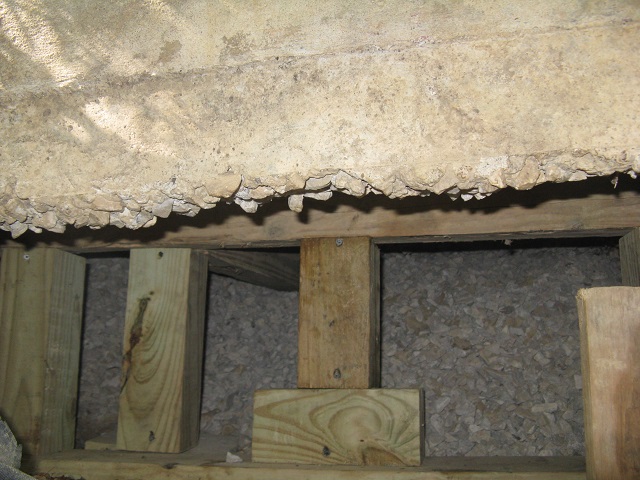
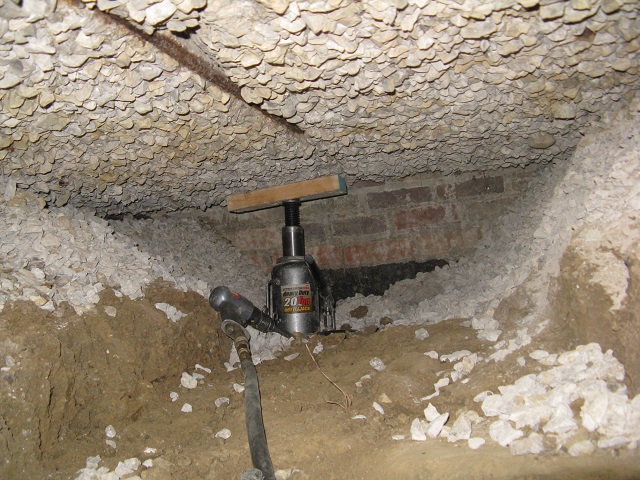
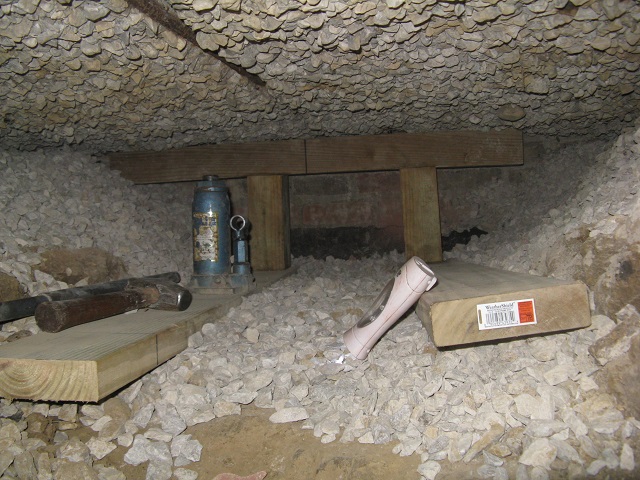
The next step was to raise the end of the porch to the proper level. This was accomplished by first jacking the porch up with a 20 ton and 6 ton bottle jacks. A 3.5 ton hydraulic floor jack proved not to be adequate. Pressure treated lumber specifically for Ground Contact applications was used to hold the porch in position as shown in the photo below. A 2x6 is used as the base plate and the vertical posts and horizontal beams (perpendicular and parallel to the length of the porch) are all 4x4.
 |
 |
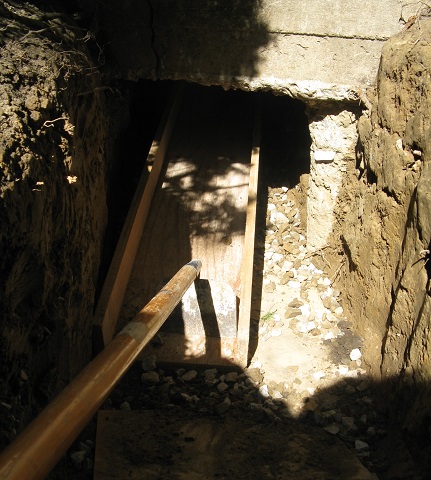
The next step was to raise the center of the porch to the proper level. This required digging out from under the porch at the crack as shown in the photos below. The Shop Vac was used once again to remove gravel as well as dirt.
 |
 |
As shown in the photo below, the steel reinforcement bar (rebar) was not placed inside the concrete as required, but instead was placed improperly at the bottom of the concrete. This prompted the crack to crack where it did; mostly along the improperly placed rebar.
See Why Use Reinforcement In Concrete:
As shown in the photos below, it was necessary to use an air chisel (left) to chisel and level the ground to make room for the 2x6 base plates with 4x4 posts and beams to hold the center of the porch in position (right).
 |
 |
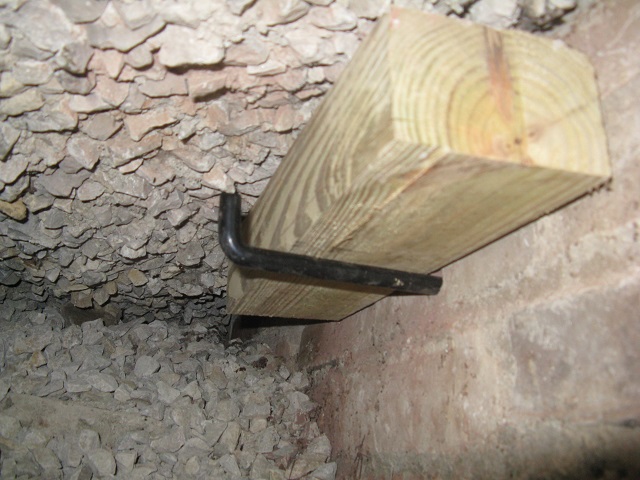
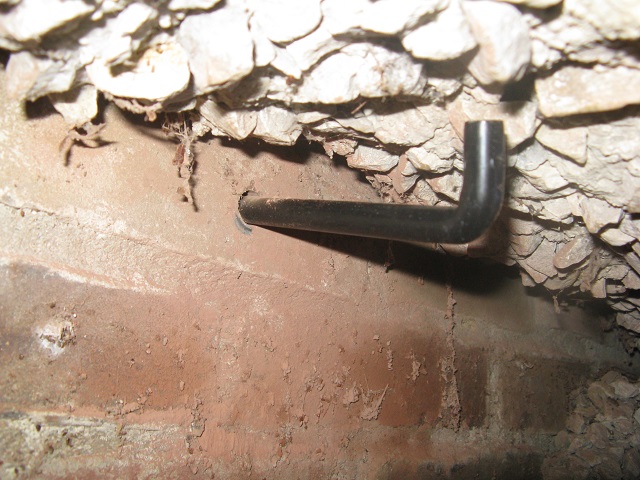
As shown in the photos below, a hole was drilled in the wall to the left and to the right of the crack and 1/2 inch by 10 inch bolts were inserted and shimmed up to the underside of the concrete porch. This to prevent the porch from ever again dropping down along the wall.
 |
 |
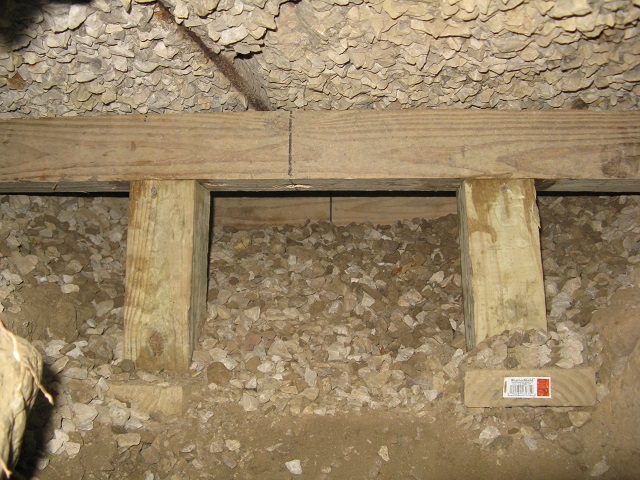
As shown in the photo below, three rows of 4x4 beams and posts were placed on the two 2x6 base plates that were placed on each side of the crack.
 |
 |
The next step was to replace the gravel. However, that was proven to be much more difficult than removing it. It was not possible to simply shovel the gravel in because it needed to be thrown up and 7 feet inside the underside of the porch. As shown in the photo below, a 6 foot ramp with sides was made to shove the gravel up and under the porch with a hoe. This was very difficult and slow.
A Leaf Blower with the necessary PVC adapters, as shown in the photos below, was proven to be effective at throwing gravel. A 45 degree elbow and the end also tossed the gravel up and a 7 foot extension reached all the way to the wall. However, the volume of gravel that it could handle was not adequate.
 |
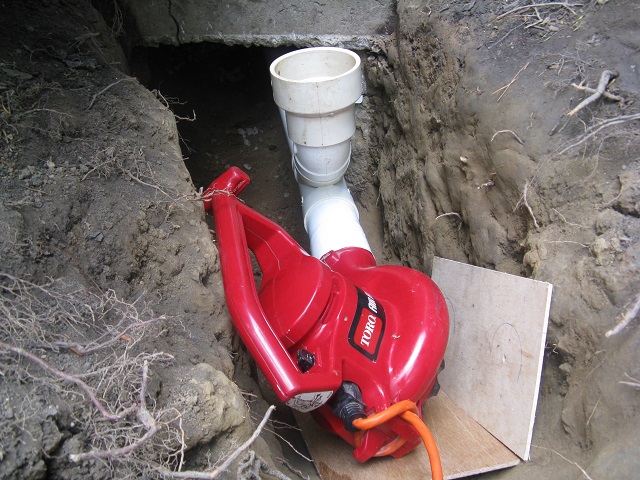 |
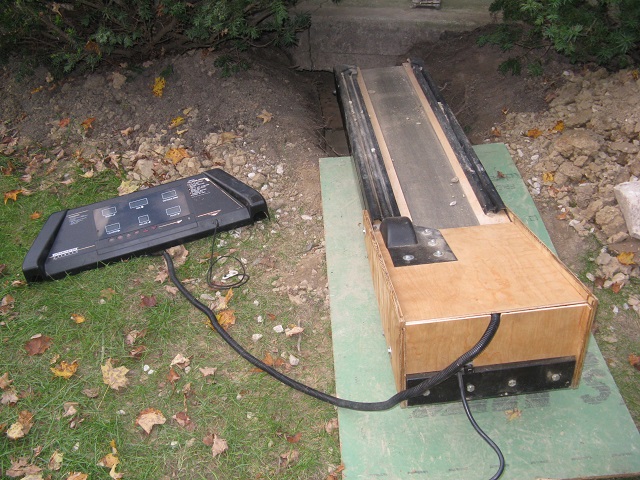
A Treadmill, as shown in the photos below, used as a conveyor belt would be the perfect solution. And with a speed of 10 miles per hour (level and 1 foot above the ground) can throw gravel up to 4 feet!
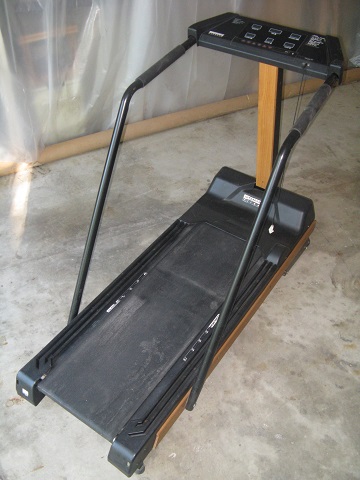 |
 |
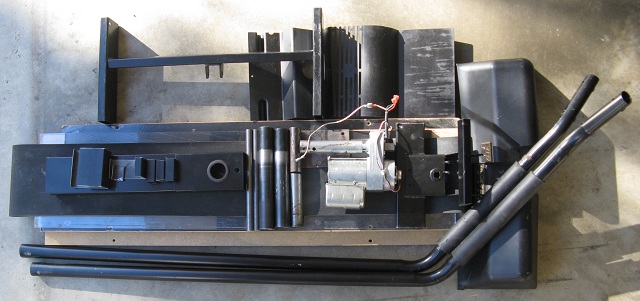
However, that Treadmill was over 2 feet wide, very heavy, and would not fit into the 15 inch wide
hole.
Therefore, the Treadmill was narrowed from 24.25 inches down to 13.5 inches, which also reduced
the weight considerably.
The before and after photos of the electronics mounted to the Treadmill frame follow.
The incline motor was not included because it was not needed and that reduced weight even more.
BEFORE NARROWING TREADMILL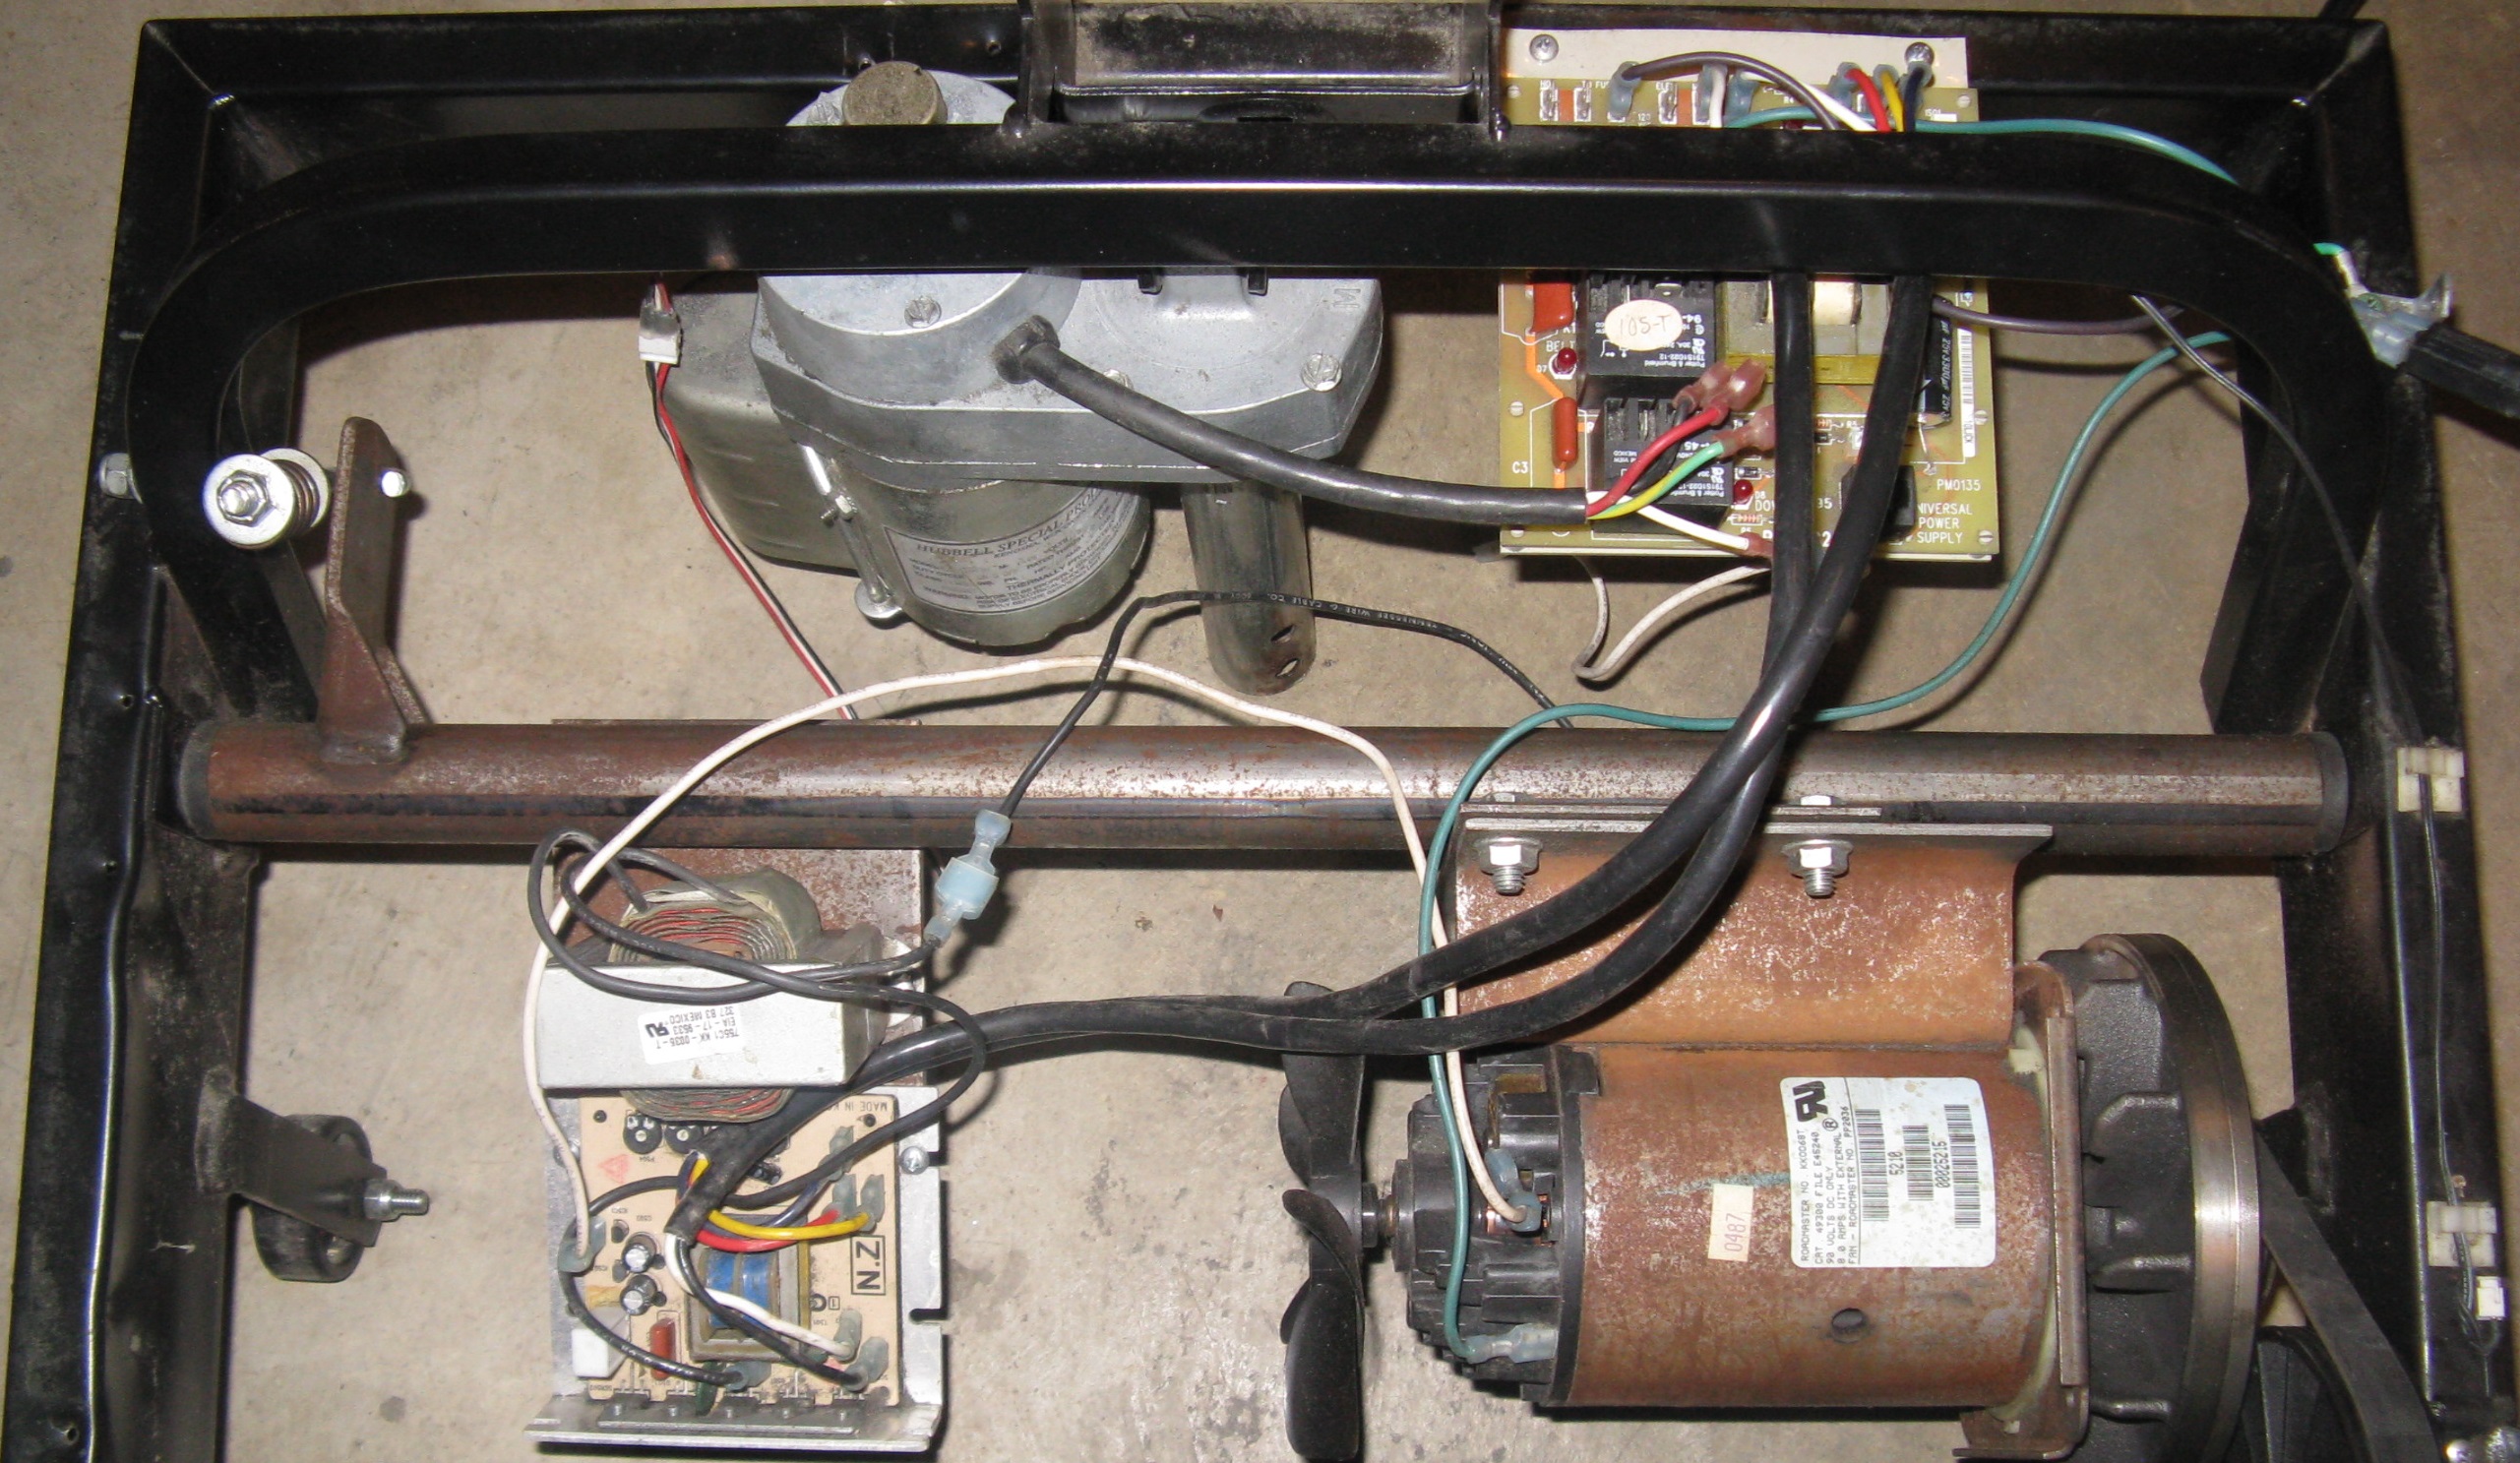 |
AFTER NARROWING TREADMILL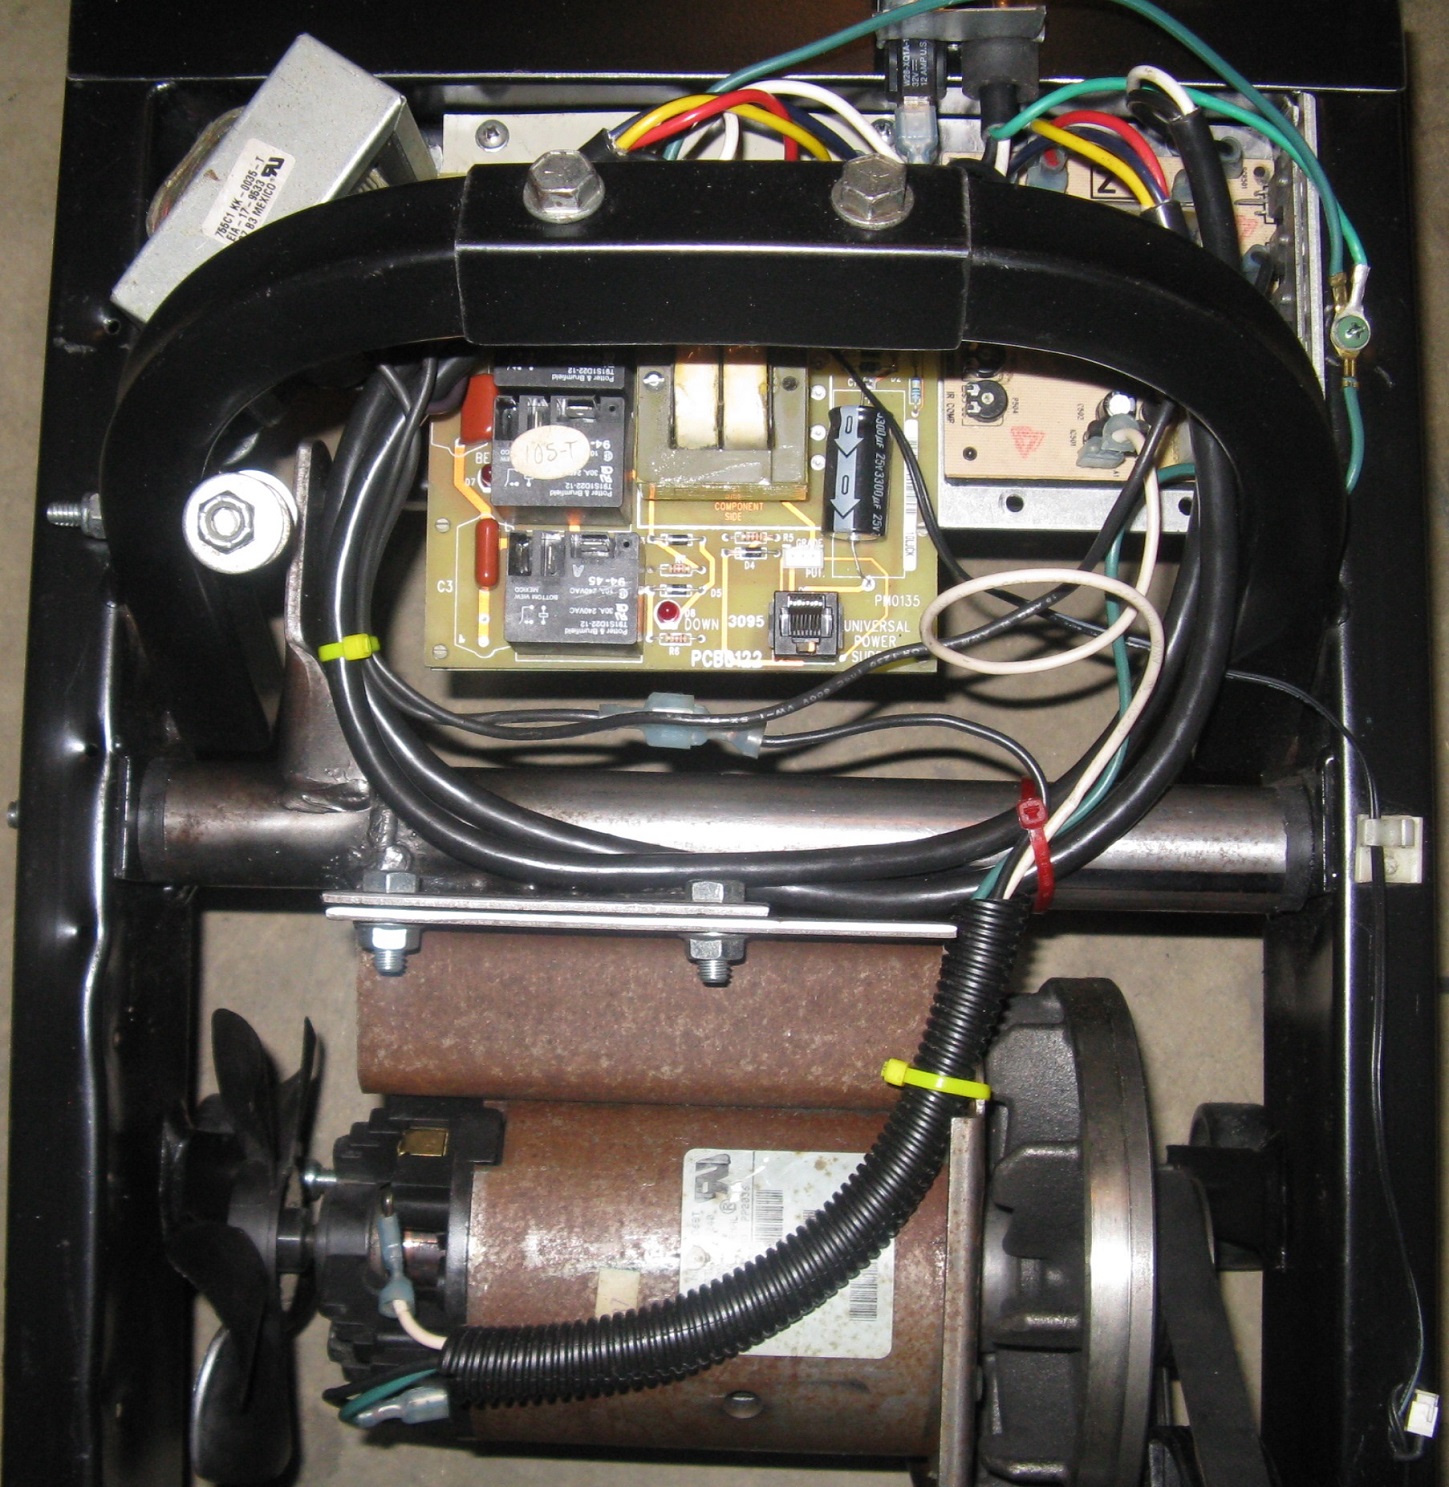 |
The narrowed Treadmill weighs 79.1 pounds and the control panel weighs 7 pounds. The center 10.75 inch section removed, along with other unnecessary items, weighs 82.9 pounds as shown in the photo below. Thus, the Treadmill originally weighed nearly 169 pounds (79.1 + 7.0 + 82.9 = 169.0). Note that the other half of the belt is a spare.
Below are photos before and after narrowing the Treadmill.
| BEFORE NARROWING TREADMILL |
AFTER NARROWING TREADMILL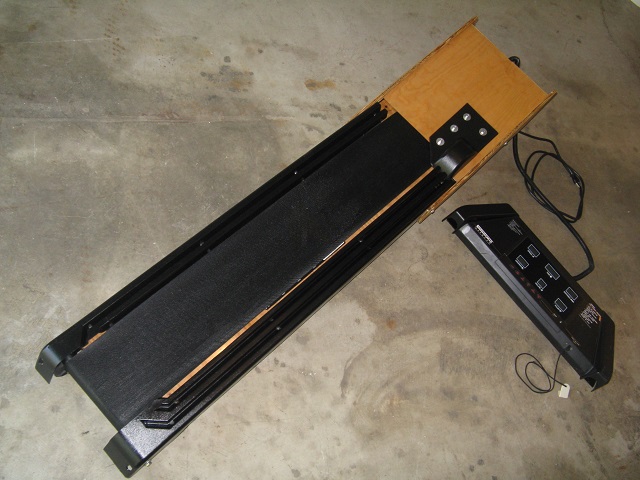 |
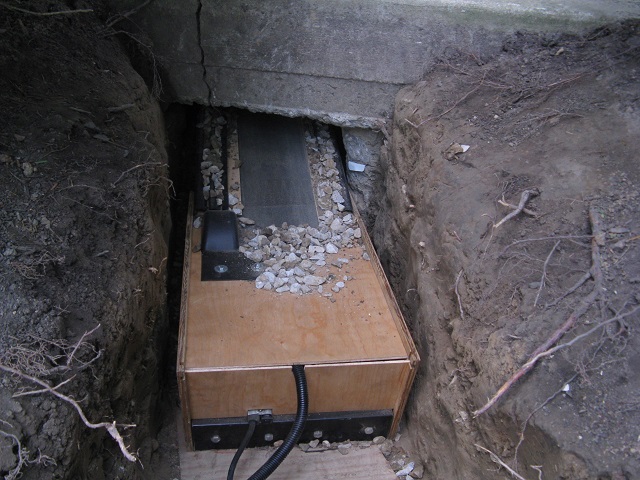
The narrowed Treadmill worked wonderfully throwing gravel up under the porch at 8 miles per hour for about 15 minutes (left photo below). However, gravel eventually worked its way under the edge of the belt causing it to slow down and then stop. That issue was solved swiftly by adding two strips of 1/4 inch plywood (one to raise the other that extends over the edge of the belt) on each side of the belt to prevent gravel from getting under the belt (right photo below).
 |
 |
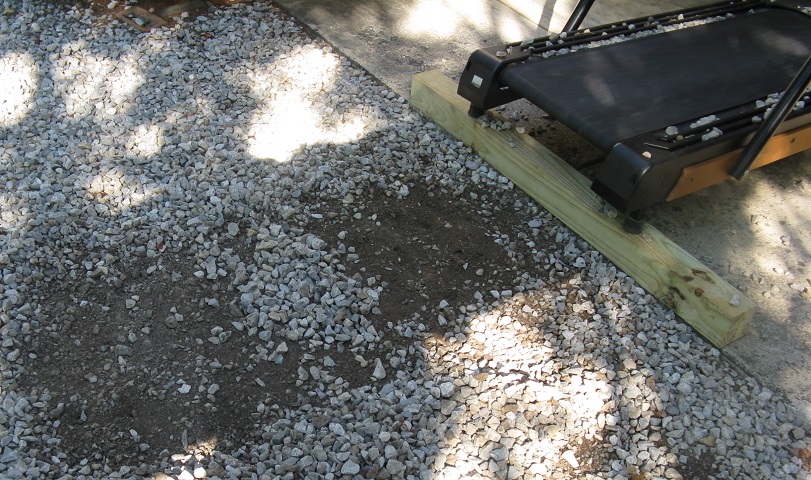
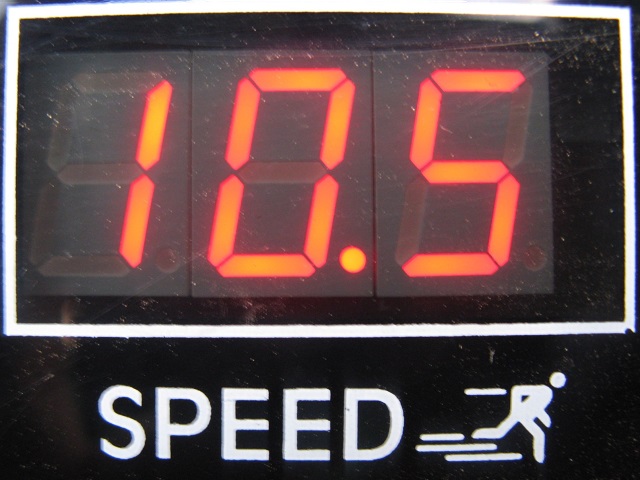
After the slight modification, the narrowed Treadmill worked perfectly throwing gravel up under the porch at 10.5 miles per hour as shown in the photos below.
 |
 |
The narrowed Treadmill needed to be removed occasionally to blow and compact gravel up and around the 4x4 posts and beams (left) till finally full (right).
 |
 |
The photos below show the porch at the crack before and after being raised.
| BEFORE RAISING (August 2016) |
AFTER RAISING (October 2016)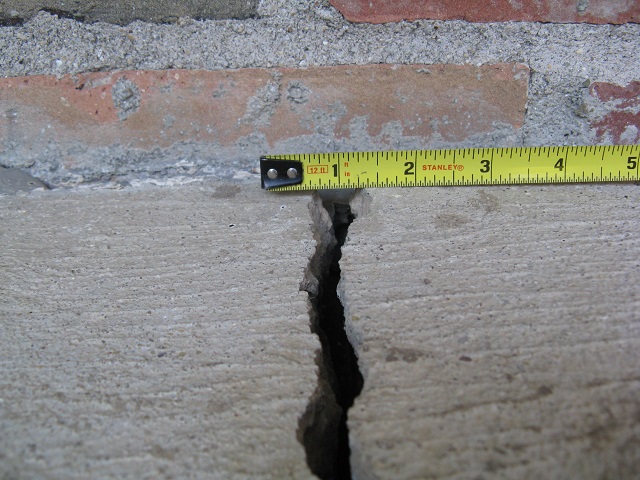 |
The photos below show the porch at the end before and after being raised.
| BEFORE RAISING (August 2016) |
AFTER RAISING (October 2016)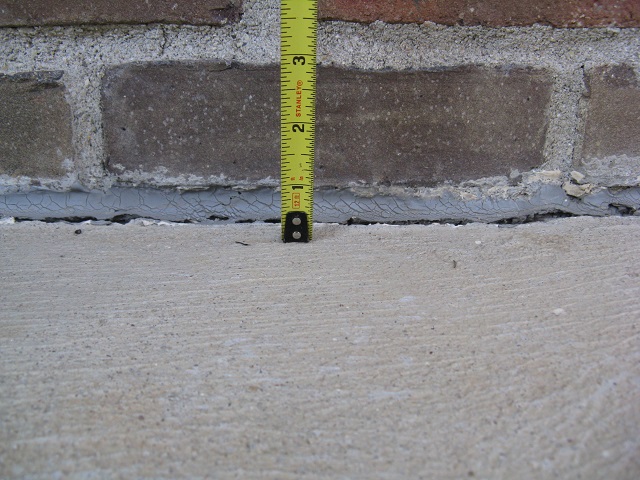 |
A great deal of effort was made to align and press the crack together using the 20 ton jack. However, as shown in the photo below, the slightest misalignment prevented that and caused the concrete to chip due to the extreme force used in an effort to press the crack together.
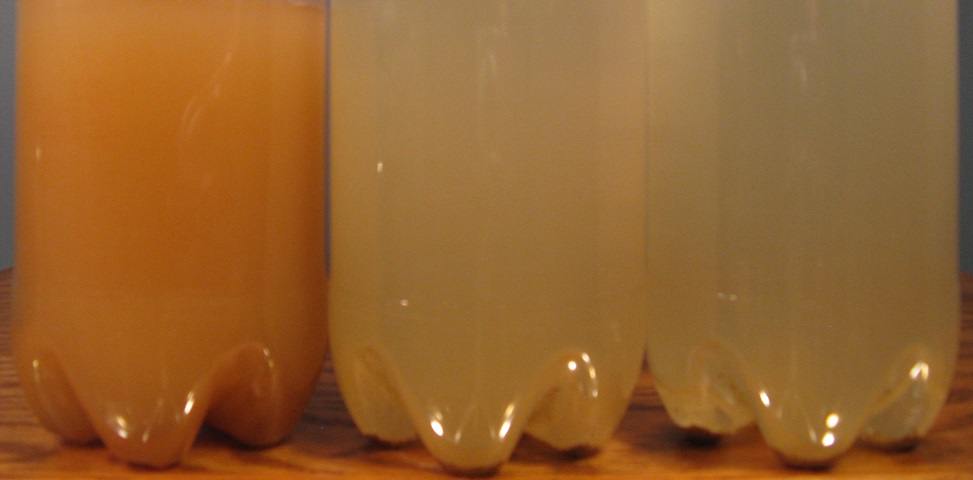
The photo below shows the water sample taken before discovering and correcting the porch pitch problem pertaining to the poor PVC pipe precision (left) and the two samples taken one and then two weeks after correcting that issue (right).
Fortunately, the author did not have the concrete leveling company raise and level the porch (after they claimed that many houses in the area had similar issues due to dry ground). Instead, the actual cause of the problem was determined and corrected and the permanent repair was made while saving $500. And the Shop Vac, Leaf Blower, and Treadmill were put to good use too!